How to set the Google Tag Manager template for Consentmo GDPR CMP
In order to set the Google Tag Manager template for Consentmo GDPR CMP, follow these steps:
In the Google Tag Manager Workspace tab make sure that the Consent Overview is Enabled
To Enable Consent Overview, you can follow the steps below:
- Navigate to the Admin tab
- Click Container Settings
- Under the Additional settings, tick the Enable consent overview checkbox.
- Click the save button in the upper right corner of the screen.

Adding Consentmo GDPR CMP from Community Template Gallery
In order to do this you can use the direct link to the Community template for Consentmo GDPR CMP. The link to it is the one below:
Setting up Consentmo GDPR CMP settings
To do the setup, please follow the steps below:
- Under the Workspace tab > Tags, click Consentmo
- Hover to the top-right corner of the Tag Configuration box and click the Edit icon.
- Set the Default Consent States to the following:

- Analytics and Statistics: Denied
- Marketing and Retargeting: Denied
- Functional Cookies: Denied
- Wait for update: 1000 milliseconds
- Save the changes.
Setting Consent Overview Additional Consent to None
To do this, follow the steps below:
- Under the Workspace tag > Tags, click Consentmo
- Hover to the top-right corner of the Tag Configuration box and click the Edit icon
- Click Advanced Settings
- Click Consent Settings
- Select No additional consent required
- Save the changes

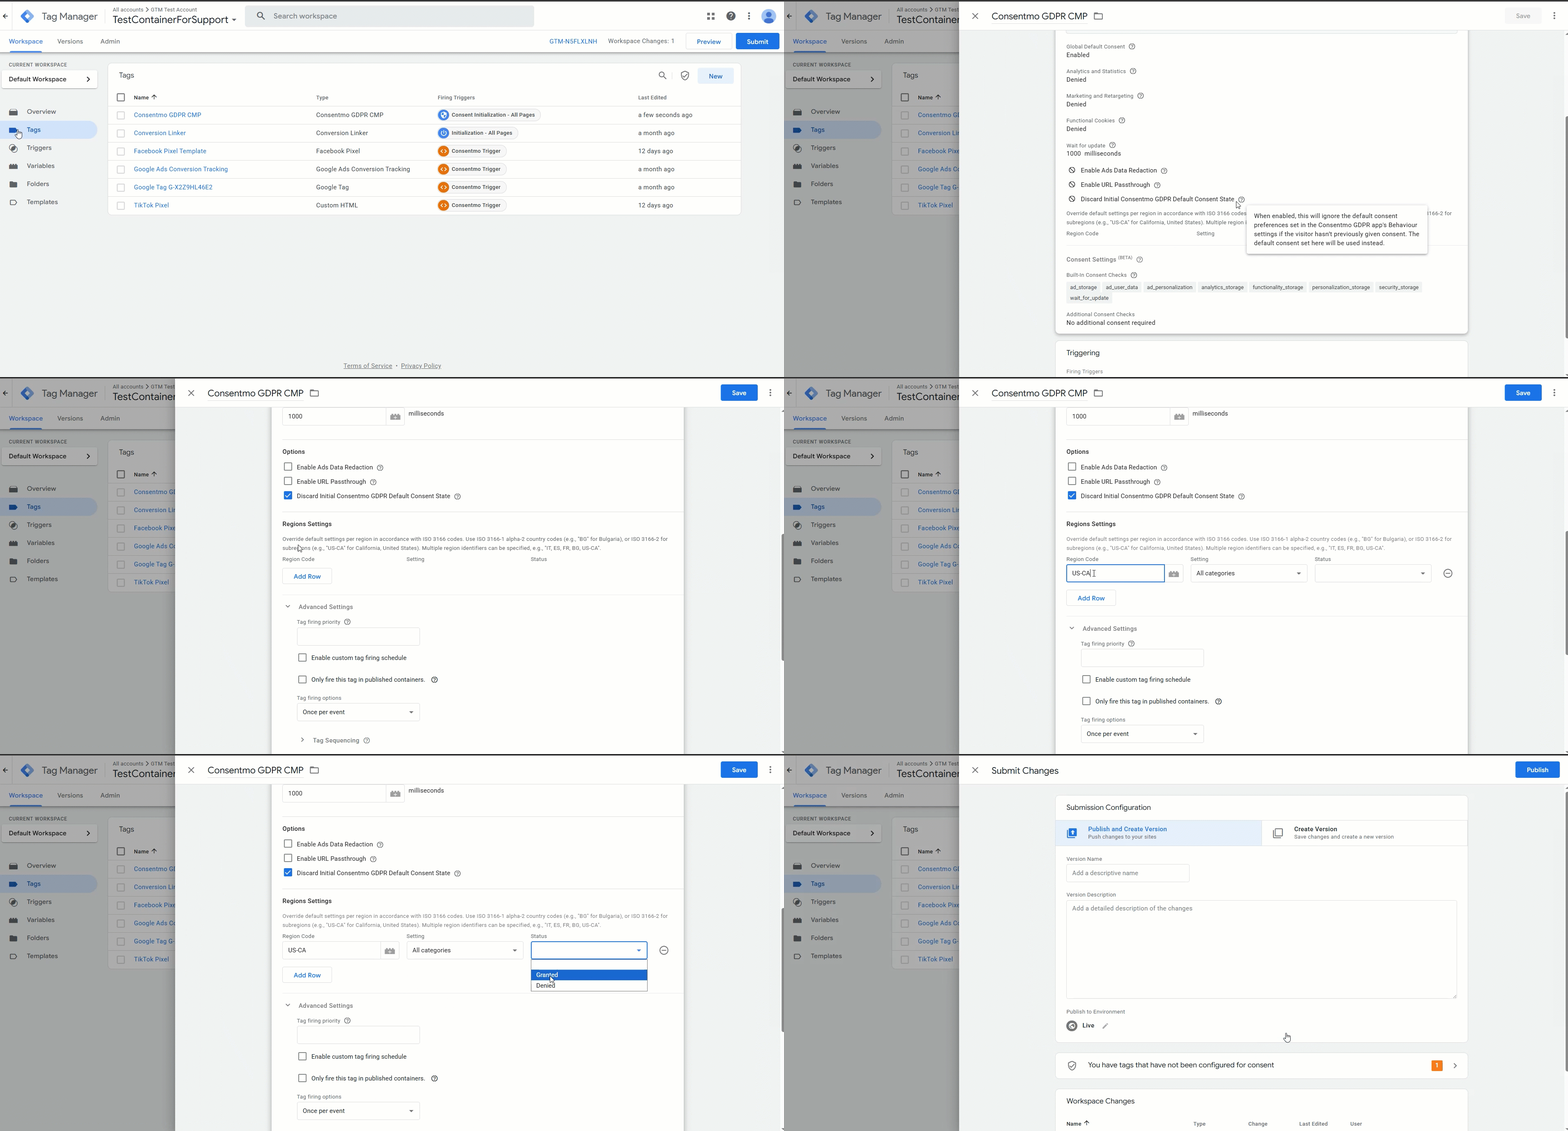
Default consent based on the visitor location
The Default consent status as per the above steps for all store visitors will be set to Denied once they access the store.
If you need to change this for the visitors from a certain country or region, you can do this from the template settings as well, as per these steps:
- In the Consentmo GDPR CMP tag, go to the option for >> Discard Initial Consentmo GDPR Default Consent State
- Once the option is checked, add the Region code, the categories for which the default consent will be changed and also the consent you want to have for the given region.
- Here, you can also check the country codes list: ISO Country Codes
- Once the parameters are set, make sure to Save > Submit > and Publish the changes in the GTM settings.
A reference on the process can also be checked here:
Need help?
For direct support, you can reach out via the live chat or by sending an email to our support team at support@consentmo.com
Updated on: 16/07/2025
Thank you!

